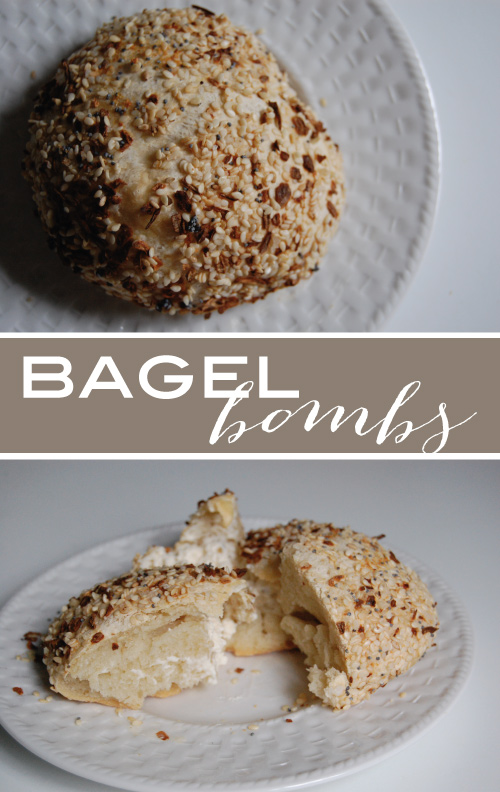
 There's only one word for these suckers... obsessed! I am, my husband is, our friends are... The bagel bombs from Christina Tosi and the Momofuku Milk Bar
 are incredible. The mother dough that is the "bagel" outside is super easy to whip up in the KitchenAid and then the filling can be whatever you want it to be, though I've yet to venture far from the original of cream cheese, bacon and scallions... You can order the book on Amazon at the link above for this recipe and a ton of my other favorites (chocolate chocolate cookie, candy bar pie, the list goes on and on!)
CSA Week 1: Greens, Greens & More Greens!
 Haute Papier is so excited to be participating in a Community Supported Agriculture (CSA) program this year. We did our research when deciding which farm we would go with and in the end chose Great Country Farms in Bluemont, Virginia. Each week we'll be giving you a peek inside our delivery boxes and sharing a recipe for something we made with the delicious fresh produce. First up is this great saute I made using some of the greens we received this week. I'm a big believer in a diet rich in vegetables and try to keep animal proteins to a minimum - not that I don't love them, I just try incorporate both fiber and protein into my diet at the same time - which is where the beans come in. This recipe is satisfying enough to have as dinner - add in a crisp, white wine (sauv blanc or sancerre are both perfect) and some crusty bread!
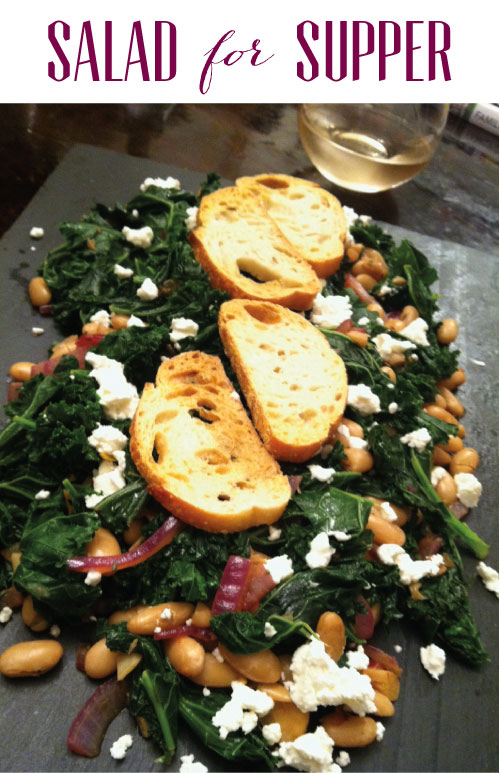
Recipe after the jump... Kale and Cannellini Beans
1 1/2 - 2 pounds kale, ribs removed salt and freshly ground pepper 1 small onion, finely sliced 1 1/2 tbsp olive oil 2 plump cloves garlic, minced pinch of red pepper flakes 2 tsp rosemary, chopped 1/2 cup dry white wine 1 1/2 cups canned cannellini beans goat cheese
Simmer the kale in a few tablespoons of water for 3-5 minutes or until just wilted. Drain and chop leaves.
In a large skillet, saute the onion in the oil with the garlic, pepper flakes and rosemary for about 3 minutes. Add the wine and cook until it's reduced to a syrupy sauce. Add the beans and kale and heath through. Taste then season with salt and pepper to your liking. Crumble goat cheese on top and serve.
Enjoy!
Make it... for Breakfast!
In all the craziness that is the weeks leading up to the National Stationery Show, I feel like I barely get out the door in the morning, let alone grabbing a Greek yogurt (my fave!) from the fridge. This weekend, I took a step back and prepared some food for the week... Healthy lunches, bags of vegetables for snacks and homemade granola to top that yogurt for breakfast. Give it a go - it just might give you that boost that I find myself needing in the morning!
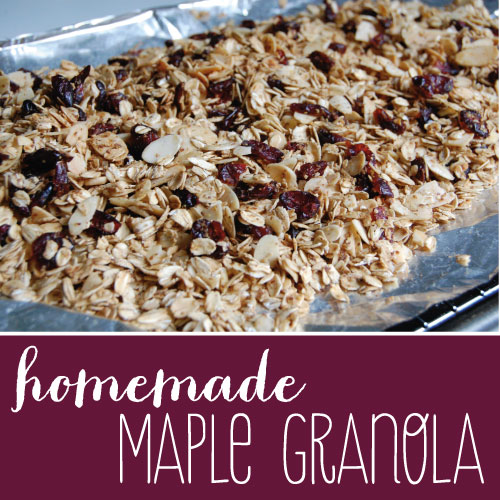
Homemade Maple Granola
1/4 cup vegetable oil 2/3 cup maple syrup 2 tsp almond extract 4 cups oatmeal (not the quick stuff… you want the old fashioned oats!) 1/2 cup pumpkin seeds 1/2 cup slivered almonds 1/2 cup golden raisins 1/2 cup dried cherries
Preheat oven to 350 degrees.
In a small bowl, combine the maple syrup, oil and almond extract. Mix well.
In a large bowl, combine the rest of the ingredients. Stir to combine. Drizzle syrup mixture over oat mixture until all syrup has been incorporated.
Spread out on a greased cookie sheet and bake for 7 minutes. Remove from oven and stir mixture around on cookie sheet. Return to oven for 8 minutes more or until golden brown.
Let cool and serve. (If stored in an air tight container, granola will keep for a couple of weeks.)
Enjoy!
Make-it Monday : Milkbar-Style
 Chocolate-Chocolate Cookiesby Christina Tosi
Makes 10 to 15 cookies
An ode to my favorite baked good of all time, the fudgy brownie, this cookie has a healthy salt content and, to me, is perfection.
INGREDIENTS 16 tablespoons (2 sticks) butter, at room temperature 1 1/2 cups sugar 1/4 cup glucose 1 egg 1/4 teaspoon vanilla extract 2 ounces 55% chocolate, melted 1 1/4 cups flour 3/4 cup cocoa powder, preferably Valrhona 3 g baking powder 3/4 teaspoon 1.5 g baking soda 1/4 teaspoon 7 g kosher salt 1 3/4 teaspoons 1/2 recipe Chocolate Crumb (below) PREPARATION Combine the butter, sugar, and glucose in the bowl of a stand mixer fitted with the paddle attachment and cream together on medium-high for 2 to 3 minutes. Scrape down the sides of the bowl, add the egg, vanilla, and melted chocolate, and beat for 7 to 8 minutes.
Reduce the mixer speed to low and add the flour, cocoa powder, baking powder, baking soda, and salt. Mix just until the dough comes together, no longer than 1 minute. (Do not walk away from the machine during this step, or you will risk overmixing the dough.) Scrape down the sides of the bowl with a spatula.
Still on low speed, add the chocolate crumbs and mix just until incorporated, about 30 seconds.
Using a 2 3/4-ounce ice cream scoop (or a 1/3-cup measure), portion out the dough onto a parchment-lined sheet pan. Pat the tops of the cookie dough domes flat. Wrap the sheet pan tightly in plastic wrap and refrigerate for at least 1 hour, or up to 1 week. Do not bake your cookies from room temperature--they will not bake properly.
Heat the oven to 375°F.
Arrange the chilled dough a minimum of 4 inches apart on parchment- or Silpat-lined sheet pans. Bake for 18 minutes. The cookies will puff, crackle, and spread. It's tough (kind of impossible) to gauge if a cookie that is this dark with chocolate is done. If after 18 minutes, the cookies still seem doughy in the center, give them another 1 minute in the oven, but not more.
Cool the cookies completely on the sheet pans before transferring to a plate or an airtight container for storage. At room temp, the cookies will keep fresh for 5 days; in the freezer, they will keep for 1 month.
Chocolate Crumb Makes about 2 1/2 cups
INGREDIENTS 2/3 cup flour 1 teaspoon cornstarch 1/2 cup sugar 2/ 3 cup cocoa powder, preferably Valrhona 1 teaspoon kosher salt 6 tablespoons butter, melted
PREPARATION Heat the oven to 300 degrees F.
Combine the flour, cornstarch, sugar, cocoa powder, and salt in the bowl of a stand mixer fitted with the paddle attachment and paddle on low speed until mixed.
Add the butter and paddle on low speed until the mixture starts to come together in small clusters.
Spread the clusters on a parchment- or Silpat-lined sheet pan. Bake for 20 minutes, breaking them up occasionally. The crumbs should still be slightly moist to the touch at that point; they will dry and harden as they cool.
Let the crumbs cool completely before using in a recipe or eating. Stored in an airtight container, they will keep fresh for 1 week at room temperature or 1 month in the fridge or freezer.
Recipe from bonappetit.com
Make-it Monday : Japanese-style
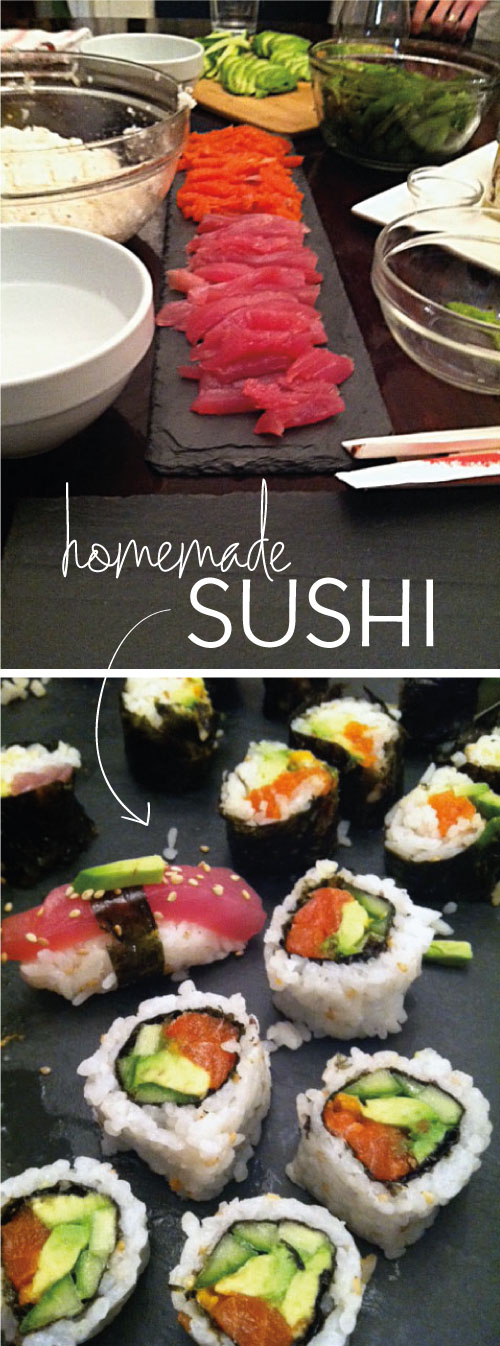 We had a ton of fun yesterday making one of my favorite foods... homemade sushi! It's really not that hard and fun to do in a group - everyone fills their rolls with their favorite Japanese morsels and then you have bites of all different combos! The key is buying fresh fish and good nori. Here in Washington, DC, I love to get the seafood at BlackSalt and you can get fresh roasted nori at the H Mart groceries. More photos and steps after the jump... There are some great online sources (and videos) for step by step instructions and recipes for the rice... Here are a couple I would recommend:
How to make the rice: http://www.makemysushi.com/index.php/Sushi-Preparations/sushi-rice.html
How to roll the sushi: http://www.youtube.com/watch?v=Nz9EAqTBrNw&feature=relmfu

Happy Sushi Making!
